Crafting is one of the most rewarding ways for teens to express individuality, unwind after a long day, and transform simple raw materials into breathtaking decor, wearable art, or personalized gifts. In a digital world, working with your hands offers a tactile escape that boosts mindfulness and confidence.
Whether you want to revamp your bedroom aesthetic, design custom accessories, or create trending Pinterest-inspired decor on a budget, this collection of 20 Amazing & Inspiring Crafts for Teens covers everything from trendy room upgrades to stylish accessories.
1. Aesthetic Pressed Flower Resin Coasters
Introduction
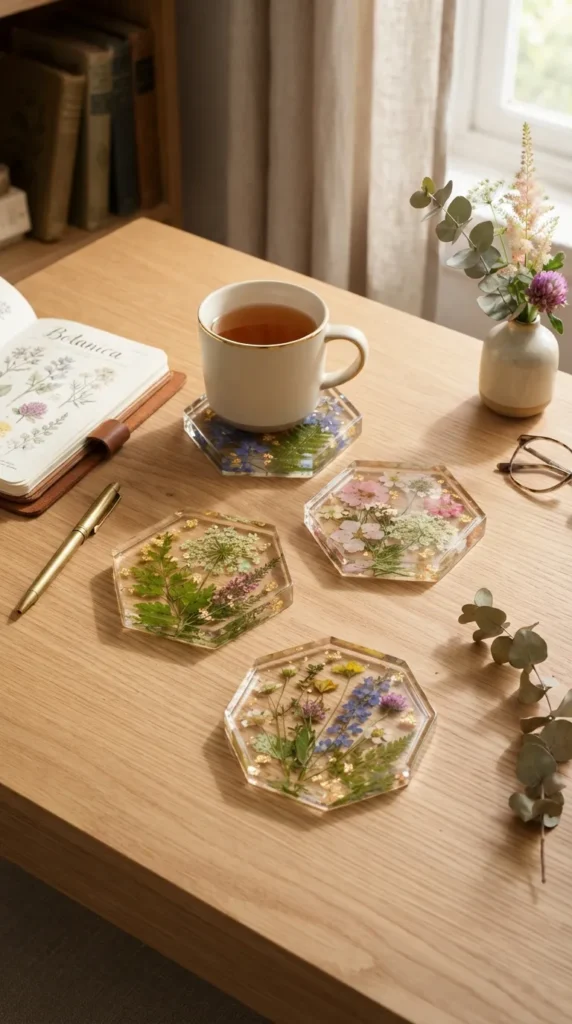
Pressed flower resin coasters bring a delicate, everlasting touch of nature into your modern room setup. They keep your desk safe from water rings while acting as miniature works of glass-like art.
What This Idea Means
This craft blends botanical preservation with crystal-clear resin casting. It allows you to freeze beautiful moments in time—like dried petals from a special bouquet or garden blossoms—in functional everyday items.
Materials Needed
- Silicone coaster molds (round or hexagonal)
- Clear epoxy resin and hardener (1:1 ratio)
- Dried, pressed flowers and leaves
- Tweezers, wooden mixing sticks, and disposable measuring cups
- Fine glitter or gold leaf flakes (optional)
- Heat gun or lighter for bubble removal
How to Make It
- Mix your epoxy resin and hardener thoroughly according to package directions, stirring slowly to avoid creating excess air bubbles.
- Pour a thin base layer of resin into your silicone mold and let it sit for 15 minutes to slightly thicken.
- Using tweezers, carefully arrange your pressed flowers, dried leaves, and optional gold leaf flakes onto the tacky resin surface.
- Pour the final layer of clear resin over the arrangement until the mold is full.
- Pass a heat gun quickly over the surface to pop any surface bubbles. Allow it to cure undisturbed for 24 to 48 hours before demolding.
Tips and Variations
- Tip: Ensure your flowers are 100% dry; any leftover moisture will turn the flowers brown inside the resin.
- Variation: Add a drop of mica powder or alcohol ink to the bottom layer for a subtle colored background.
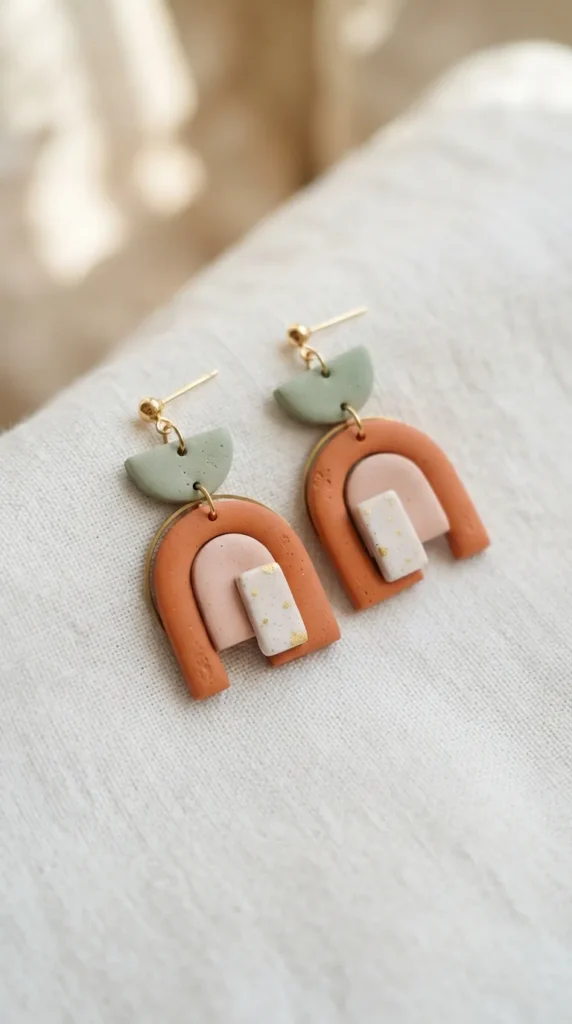
2. DIY Polymer Clay Statement Earrings
Introduction
Lightweight, colorful, and completely customizable, polymer clay statement earrings are an absolute staple in teen DIY fashion trends.
What This Idea Means
Polymer clay crafting allows you to turn raw, pliable clay into boutique-quality jewelry. It gives you full control over shapes, textures, color palettes, and finish styles.
Materials Needed
- Polymer clay in your favorite color aesthetic
- Mini clay cutters or craft blade
- Acrylic roller or pasta machine
- Parchment paper and baking sheet
- Jewelry jump rings, earring posts, and jewelry pliers
- Sandpaper (400 to 1000 grit)
How to Make It
- Condition your polymer clay by kneading it until soft and workable.
- Roll the clay into an even sheet (about 2–3 mm thick) using an acrylic roller.
- Use miniature cookie cutters or geometric clay cutters to stamp out matching shapes.
- Use a toothpick or small hole punch to create jump ring holes near the edges where pieces will join.
- Bake on a parchment-lined tray according to clay package instructions (usually 275°F / 135°C for 15-30 minutes).
- Let cool, sand smooth under water, and assemble the pieces using jump rings and earring posts.
Tips and Variations
- Tip: Use rubbing alcohol on a cotton swab before baking to lift dust particles and fingerprints.
- Variation: Marble two or three complementary clay colors together before cutting out shapes.
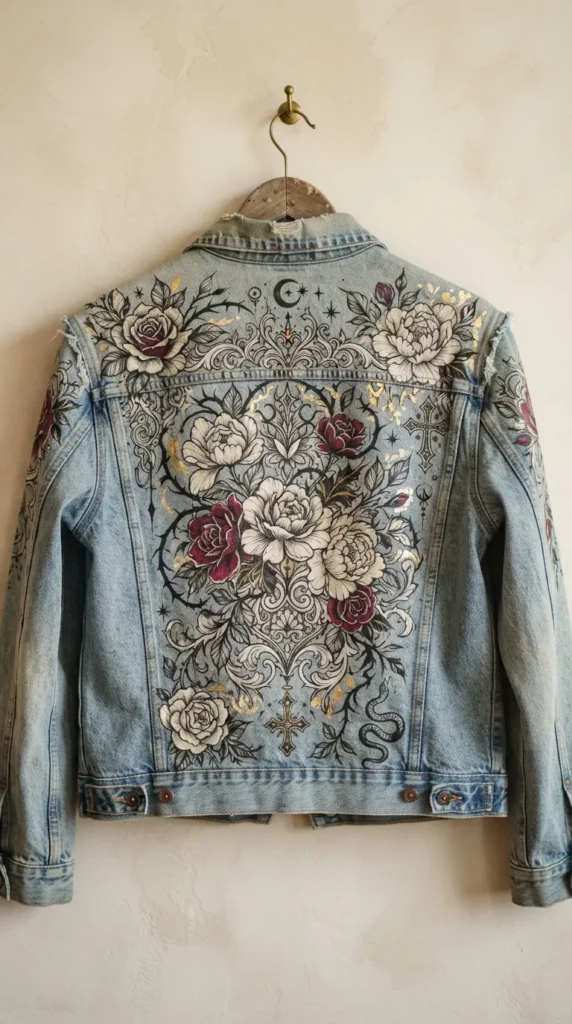
3. Custom Painted Denim Jacket
Introduction
Turn a plain denim jacket into a wearable canvas. Custom denim jackets let you display your art style wherever you go.
What This Idea Means
Wearable art emphasizes personal branding and sustainable upcycling. It takes a classic closet staple and elevates it into a statement piece filled with graphics, quotes, or illustrations.
Materials Needed
- Thrifted or basic denim jacket
- Fabric medium mixed with acrylic paints (or dedicated textile paints)
- Paintbrushes (flat, detail, and filbert brushes)
- Chalk or light pencil for sketching
- Masking tape for crisp lines
- Parchment paper and iron for heat-setting
How to Make It
- Wash and dry the denim jacket without fabric softener to prepare the fibers.
- Place cardboard inside the jacket back to create a flat, rigid painting surface.
- Sketch your design lightly onto the back panel using tailor’s chalk.
- Apply a base layer of white fabric paint over your design area so colors pop brightly on dark denim.
- Paint your artwork using layered textile colors. Let it dry fully between coats.
- Once dry, heat-set the design using a hot iron over parchment paper for 3–5 minutes.
Tips and Variations
- Tip: Always mix acrylic paint with fabric medium (1:1 ratio) to prevent cracking when the denim flexes.
- Variation: Combine painting with retro patches or subtle hand-embroidery along the seams.
4. Bohemian Yarn Wall Hanging
Introduction
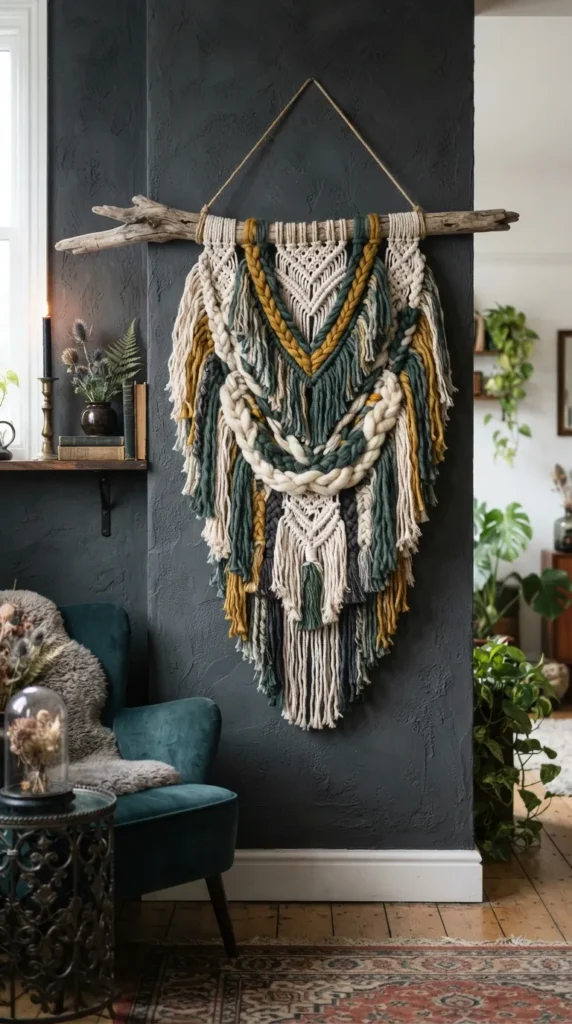
Bring warmth, texture, and cozy boho energy into your bedroom space with a handmade yarn wall hanging mounted on driftwood or a dowel.
What This Idea Means
This project relies on fiber arts and knotting techniques. It combines soft textures and harmonious colors to create architectural wall decor without heavy framing.
Materials Needed
- Wooden dowel or natural piece of beach driftwood
- Assorted skeins of yarn (varying textures, weights, and colors)
- Wooden beads or macrame cords (optional)
- Scissors and tape measure
How to Make It
- Cut strands of yarn twice the length of your desired wall hanging height.
- Fold a strand in half to form a loop at the top.
- Place the loop behind your wood dowel, pull the yarn tails through the loop, and pull tight (Lark’s Head Knot).
- Repeat this step across the dowel, alternating colors and yarn textures to build layers.
- Comb through the hanging yarn with your fingers to align the strands.
- Use sharp fabric scissors to trim the bottom edge into a sharp V-shape, straight fringe, or asymmetrical angle.
Tips and Variations
- Tip: Use a mix of chunky roving wool, metallic yarn, and textured bouclé for maximum dimension.
- Variation: Thread large wooden beads onto select center strands before knotting.
5. Marbled Ceramic Trinket Dishes
Introduction
Marbled trinket dishes are stylish catch-alls for rings, keys, or ear buds. They look like expensive designer stoneware but are surprisingly simple to make.
What This Idea Means
Marbling involves blending swirling colors together without mixing them completely. It captures organic stone and marble aesthetics using easy-to-sculpt oven-bake clay.
Materials Needed
- Oven-bake polymer clay (white, grey, black, or gold accent clay)
- Acrylic rolling pin
- Small oven-safe ceramic bowl (for shaping)
- Gold liquid leaf paint and fine detail paintbrush
- Clear gloss varnish
How to Make It
- Roll two or three contrasting clay colors into long snake-like ropes.
- Twist the ropes together, fold in half, and roll again to create dynamic color swirls.
- Gently press the twisted roll into a ball, then flatten it out with a rolling pin to reveal the marbled pattern.
- Cut a circular shape using a small plate or lid as a template.
- Place the clay circle inside an oven-safe ceramic bowl so the edges curve gently upward.
- Bake inside the bowl according to clay instructions, let cool, and paint the rim with gold leaf paint.
Tips and Variations
- Tip: Don’t over-mix the clay colors, or you will end up with one solid blended color instead of marble swirls.
- Variation: Use pastel shades like blush pink, sage green, and lavender for a dreamier aesthetic.
6. Hand-Poured Scented Soy Candles in Vintage Teacups
Introduction
Create cozy, fragrant ambiance in your room with DIY soy candles poured right into vintage thrifted teacups or glass jars.
What This Idea Means
Candle-making mixes aroma-therapy with functional craft design. Reusing vintage vessels turns old treasures into charming home accessories.
Materials Needed
- Natural soy wax flakes
- Cotton candle wicks with metal bases and wick centering tools
- Essential oils or candle fragrance oils (e.g., lavender, vanilla, eucalyptus)
- Thrifted vintage ceramic teacups
- Double boiler or heat-safe pouring pitcher
- Glue dots or hot glue gun
How to Make It
- Secure the metal base of a candle wick to the center bottom of your clean teacup using a glue dot.
- Melt soy wax flakes in a double boiler over medium heat until fully liquid (around 185°F / 85°C).
- Remove from heat, let cool slightly, and stir in your desired fragrance oil thoroughly for two minutes.
- Slowly pour the liquid wax into the teacup, keeping the wick centered with a wick holder or wooden chopsticks.
- Allow the candle to cool and set completely overnight at room temperature. Trim the wick to 1/4 inch before lighting.
Tips and Variations
- Tip: Pour wax slowly to prevent air bubbles and sinkholes near the wick.
- Variation: Sprinkle dried lavender buds or rose petals around the top edge right as the wax starts to solidify.


7. Embroidered Aesthetic Canvas Tote Bags
Introduction
Upgrade an ordinary plain canvas tote bag with minimalist line art, floral patterns, or uplifting quotes using basic hand embroidery stitches.
What This Idea Means
Textile embellishment lets you replace plastic shopping bags with sustainable fashion. Embroidery transforms basic cotton canvas into bespoke carrying gear.
Materials Needed
- Plain cotton canvas tote bag
- Embroidery floss in chosen colors
- Embroidery needles and an 8-inch wooden hoop
- Heat-erasable fabric marker or transfer paper
- Scissors
How to Make It
- Iron the tote bag flat to remove wrinkles.
- Draw your design directly onto the canvas using a heat-erasable fabric pen.
- Stretch the fabric section tightly inside your wooden embroidery hoop.
- Thread your needle with 3 strands of embroidery floss and knot the end.
- Stitch over your guidelines using simple stitches like the backstitch for lines and French knots for flower centers.
- Once finished, remove the hoop and run an iron over the canvas to make the erasable ink lines disappear.
Tips and Variations
- Tip: Keep your stitch lengths uniform so your outlines look neat and professionally made.
- Variation: Combine line embroidery with soft watercolor fabric paints background washes.
8. Terrarium Mini Moss Glass Globes
Introduction
Construct a lush mini indoor ecosystem inside a clear glass globe or vessel using live moss, pebbles, and tiny decorative figurines.
What This Idea Means
Terrarium building combines living plant design with miniature landscape styling. It offers a low-maintenance way to bring vibrant green life onto your study desk.
Materials Needed
- Clear glass globe container, jar, or geometric planter
- Small aquarium gravel or pebbles
- Activated charcoal pellets
- Sphagnum moss and potting soil
- Live mood moss or sheet moss
- Tweezers and miniature decorative items (mushrooms, crystals)
How to Make It
- Pour an inch layer of gravel at the bottom of the glass container for water drainage.
- Add a thin layer of activated charcoal over the gravel to keep the soil fresh and prevent mold.
- Layer potting soil on top, smoothing it out with a spoon.
- Lightly mist live moss with water and place it carefully onto the soil using long tweezers.
- Press tiny crystals, miniature clay mushrooms, or small stones into the moss bed.
- Mist lightly with water and cover or leave open depending on your moss type.
Tips and Variations
- Tip: Avoid placing closed terrariums in direct sunlight; indirect bright light prevents overheating.
- Variation: Build a desert-themed open terrarium using coarse sand, mini succulents, and quartz crystals.
9. Beaded Phone Charm Straps
Introduction
Infuse 90s nostalgia into your tech using custom beaded phone charms featuring Y2K charms, pearl accents, and personalized letter beads.
What This Idea Means
Accessory crafting gives your everyday digital companion a punch of personality. These phone wristlets keep your device secure while matching your outfits.
Materials Needed
- Durable nylon cord or cord thread (0.8 mm)
- Assorted beads (seed beads, faux pearls, smiley faces, fruit shapes)
- Alphabet beads
- Scissors and tape
- Lighter (for sealing cord ends safely)
How to Make It
- Cut a 14-inch piece of nylon cord and fold it in half to form a loop at the top.
- Tie a secure knot about 2 inches down from the top loop—this loop hitches onto your phone case.
- Secure the loop to your workspace with tape to hold it steady while stringing.
- String your colorful beads, names, or aesthetic patterns down both loose ends of the cord.
- Combine the ends and tie a double knot at the bottom.
- Trim excess cord and carefully singe the knot tip with a lighter to fuse it securely.
Tips and Variations
- Tip: Test the cord strength before finishing to ensure it comfortably supports the weight of your phone.
- Variation: Use monochromatic freshwater pearls and clear crystals for a minimalist luxury look.
10. Custom Air-Dry Clay Flower Vases
Introduction
Craft organic, sculptural vases using budget-friendly air-dry clay built around empty glass bottles or jars.
What This Idea Means
Upcycled vessel sculpting turns glass jars into high-end ceramic-look vases without needing a pottery kiln.
Materials Needed
- Air-dry clay (white or terracotta)
- Recycled small glass bottle or jar (serves as the waterproof liner)
- Clay modeling tools or butter knife
- Water bowl (for smoothing)
- Sandpaper
- Acrylic sealant or waterproof varnish
How to Make It
- Roll out air-dry clay into an even slab about 1/4-inch thick.
- Wrap the clay slab completely around your glass jar, pinching the seams closed with wet fingers.
- Sculpt arches, ribbed textures, or squiggles on the outer clay surface using modeling tools.
- Smooth out cracks using a small amount of water on your fingertips.
- Allow the clay to air-dry completely for 48 to 72 hours, flipping it occasionally.
- Sand down rough edges and coat with acrylic paint and matte sealer.
Tips and Variations
- Tip: Keep your glass core inside so the finished vase can hold real water without dissolving the air-dry clay.
- Variation: Apply a speckled stone spray paint finish to mimic modern terrazzo ceramics.
11. Aesthetic Pressed Botanical Journal Cover
Introduction
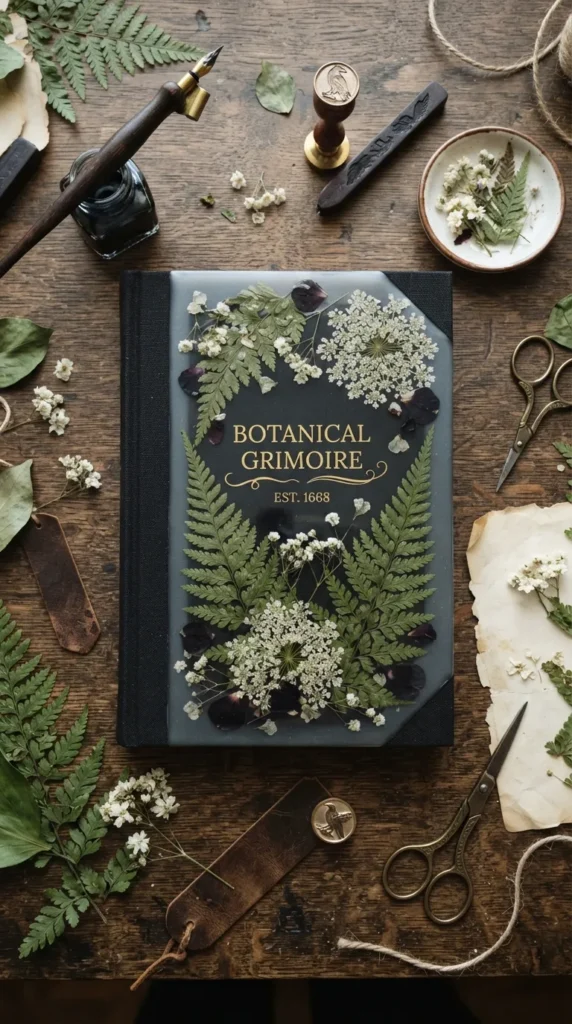
Turn a basic notebook into an heirloom-style keepsake by decorating the cover with real pressed flowers and sealing them under crystal-clear Mod Podge.
What This Idea Means
Bookbinding decoration combines scrapbooking aesthetics with functional stationery design, turning daily journaling into a sensory experience.
Materials Needed
- Hardcover notebook or craft paper journal
- Dried pressed foliage, fern leaves, and flower petals
- Mod Podge (Matte or Gloss finish)
- Foam paintbrush
- Tweezers
- Clear acrylic protective spray layer
How to Make It
- Wipe the journal cover clean of dust.
- Arrange your dry foliage on top of the cover using tweezers until you like the composition.
- Lift each piece and apply a thin layer of Mod Podge underneath to secure it in place.
- Brush a smooth, gentle coat of Mod Podge over the top of the whole cover to seal the florals.
- Let dry for 2 hours, then apply a second coat for added durability.
- Seal with clear acrylic spray to eliminate sticky residues.
Tips and Variations
- Tip: Work gently with delicate petals, as wet Mod Podge can tear thin leaves if brushed roughly.
- Variation: Lay down background pages torn from vintage books before gluing your pressings.
12. Painted Wooden Photo Clips & Fairy Light Garland
Introduction
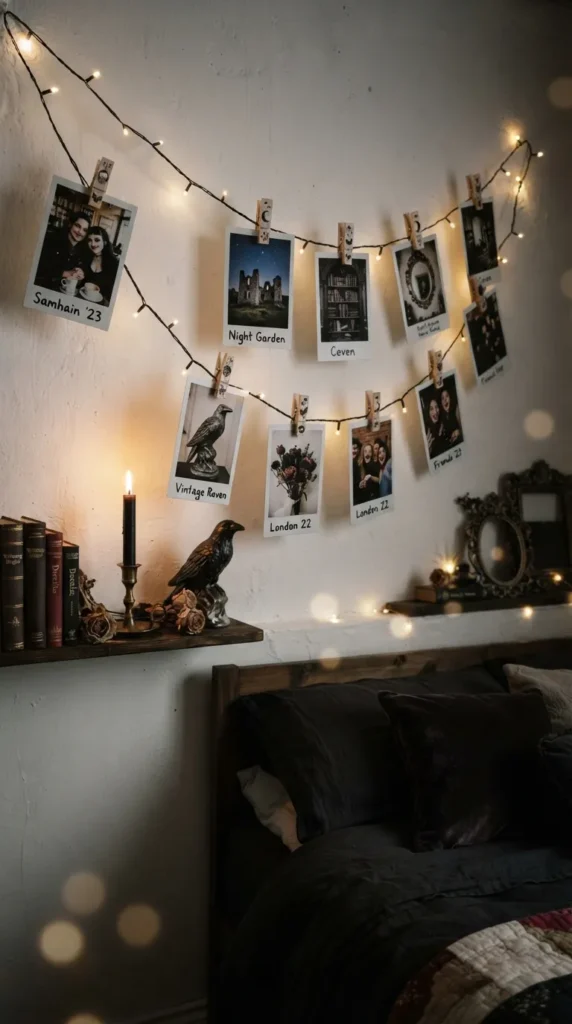
Illuminate your bedroom walls with warm fairy lights while displaying instant photos, art prints, and concert tickets using custom-painted mini clothespins.
What This Idea Means
Functional ambient decor seamlessly merges photo displays with accent lighting, making your personal memories part of your bedroom design.
Materials Needed
- Mini wooden clothespins
- Pastel acrylic paints and metallic detail pens
- Warm white LED string fairy lights (copper wire style)
- Wall-safe hooks or thumbtacks
- Fine paintbrushes
How to Make It
- Clip mini clothespins onto cardboard strips so they stand up easily for painting.
- Paint clothespins with soft pastel base coats (sage green, butter yellow, soft lavender).
- Once dry, paint mini details like daisies, checkerboard prints, or stars using a fine detail brush.
- String your LED fairy lights across your wall using wall-safe adhesive hooks.
- Clip your favorite instant photos and polaroids onto the wire using your decorated pins.
Tips and Variations
- Tip: Seal clothespins with matte varnish so the paint doesn’t rub off when opening the clips.
- Variation: Wrap colorful embroidery floss tightly around sections of the clothespins instead of using paint.
13. Minimalist Wire-Wrapped Crystal Jewelry
Introduction
Turn raw gemstone crystals and polished tumbled stones into elegant pendant necklaces using easy wire-wrapping techniques.
What This Idea Means
Jewelry wirework teaches foundational metalworking principles without complex soldering tools. It highlights the natural beauty of raw gemstones.
Materials Needed
- Raw or tumbled crystals (amethyst, quartz, green aventurine)
- 20-gauge and 24-gauge jewelry wrapping wire (gold, silver, or copper)
- Wire cutters, round-nose pliers, and chain-nose pliers
- Necklace chain or cord cord
How to Make It
- Cut two 10-inch pieces of 20-gauge wire and cross them at their centers, twisting them together to form a base cage.
- Place the crystal securely inside the middle of the wire cross.
- Bring the wires up along the sides of the stone, twisting adjacent wires together to wrap the crystal securely.
- Gather all four wire ends at the top center of the stone.
- Use round-nose pliers to bend the top wires into a sturdy loop (bail) for your chain.
- Wrap excess wire tail neatly around the base of the loop and snip clean.
Tips and Variations
- Tip: Make sure the wire cage hugs the crystal tightly so it cannot slide out through gaps.
- Variation: Use oxidized copper wire for a vintage, antique jewelry finish.


14. Upcycled Fabric Scrap Patchwork Bucket Hat
Introduction
Stitch together colorful denim or cotton fabric scraps to make a trendy, eco-friendly bucket hat.
What This Idea Means
Sustainable sewing repurposes leftover fabric scraps into streetwear accessories, promoting eco-conscious style and reduction of textile waste.
Materials Needed
- Leftover fabric scraps (denim, corduroy, cotton prints)
- Bucket hat paper pattern template
- Fabric scissors, pins, and measuring tape
- Sewing machine (or needle and thread)
- Iron and ironing board
How to Make It
- Stitch your fabric scraps together to create larger composite fabric sheets.
- Press all sewn scrap seams flat using an iron.
- Pin your bucket hat paper pattern pieces (crown, side band, and brim) onto the patchwork sheets.
- Cut out your pattern pieces, cutting two sets (one for exterior, one for lining).
- Pin and stitch the crown to the side band, then attach the circular brim.
- Assemble the inner lining, insert it into the hat, and topstitch around the brim edge.
Tips and Variations
- Tip: Iron your seams open at every step to keep your bucket hat smooth and structured.
- Variation: Add simple hand-embroidered icons onto the patchwork panels for extra personality.
15. Personalized Neon-Style Acrylic Sign
Introduction
Capture bright neon aesthetics safely using flexible EL wire attached to clear acrylic sheets to make customized glowing wall art.
What This Idea Means
Modern light art provides high-impact visual flair for gaming setups or bedroom walls using cool-to-the-touch LED wire instead of fragile glass.
Materials Needed
- Clear acrylic sheet (8×10 inch or larger)
- Electroluminescent (EL) wire with battery pack driver
- Super glue or clear gel adhesive
- Printed script text or silhouette template
- Painter’s tape
How to Make It
- Print your favorite quote or graphic onto paper and tape it under the clear acrylic sheet.
- Trace the script lines on the top side of the acrylic using your flexible EL wire.
- Apply small dots of super glue along the line, pressing the EL wire firmly into place as you shape it.
- Use black electrical tape to cover sections of wire where you want the light hidden between words.
- Mount the battery pack behind the sign frame or wall hook.
Tips and Variations
- Tip: Use continuous cursive fonts so your wire flows smoothly without frequent sharp cuts.
- Variation: Paint the back of the acrylic sheet with black acrylic paint to make the glowing wire pop brightly.
16. Aesthetic Sun Catcher Stained Glass Style Frame
Introduction
Catch morning light with faux stained-glass sun catchers made with glass paint and black liquid leading inside floating frames.
What This Idea Means
Faux stained glass mirrors classic glass blowing and leadwork art using accessible craft materials, casting vibrant color reflections across room walls.
Materials Needed
- Glass photo frame (or floating glass frame)
- Black dimensional glass liner (liquid leading paste)
- Transparent glass paints or stained glass paint set
- Fine tip paintbrushes
- Printed line art template
How to Make It
- Clean the glass pane thoroughly with rubbing alcohol.
- Place your printed line art underneath the glass sheet as your guide.
- Outline all design lines using black dimensional glass liner, keeping lines raised and connected.
- Allow the black outline paste to dry completely for 4-6 hours until firm.
- Fill inside the outlines with transparent glass paints using soft brushes, avoiding air bubbles.
- Let dry for 24 hours, then hang the frame in a sunny window spot.
Tips and Variations
- Tip: Avoid overworking the glass paint; drop it in and let it flow smoothly to edges.
- Variation: Create suncatchers on clear acrylic discs for lightweight hanging ornaments.
17. Hand-Drawn Floral Bookmarks with Tassels
Introduction
Craft sturdy, hand-illustrated watercolor bookmarks decorated with floral motifs, hand lettering, and silky yarn tassels.
What This Idea Means
Paper crafting offers portable art practice that enhances your reading setup or makes thoughtful gifts for fellow book lovers.
Materials Needed
- Heavyweight watercolor paper (300 GSM)
- Watercolor paints and fine detail brushes
- Waterproof black fine-liner pens
- Single hole punch and colorful tassel cord
- Corner rounder punch (optional)
How to Make It
- Cut watercolor paper into 2×6 inch strips.
- Paint soft watercolor washes or botanical florals onto the paper strips and let dry completely.
- Add fine outlines, leaves, and quotes over the dry watercolor using waterproof fine-liners.
- Round the top and bottom corners using a corner punch for a finished look.
- Punch a hole centered at the top of the bookmark.
- Loop a silky tassel through the hole and secure tightly.
Tips and Variations
- Tip: Use 300 GSM watercolor paper to keep the bookmark from warping when wet paint is applied.
- Variation: Laminate the finished bookmark for long-lasting protection against wear and moisture.
18. Chunky Knit Arm Blankets
Introduction
Knit a cozy, super-soft chunky chenille blanket in just an afternoon using only your arms—no knitting needles required!
What This Idea Means
Arm knitting uses giant yarn to create thick knit fabrics fast. It provides a tactile, soothing experience resulting in luxury bedding decor.
Materials Needed
- 4-6 skeins of jumbo chenille yarn (Size 7 or higher)
- Flat surface (floor or table)
- Scissors
How to Make It
- Make a slip knot near the end of your yarn, leaving a short tail.
- Create your cast-on row by pulling loops through previous loops to set your blanket width (usually 25-30 loops wide).
- Working from left to right, pull a loop of working yarn up through each existing loop across the row.
- Reverse direction (right to left) and repeat the process for every row, maintaining consistent loop heights.
- When reaching your desired length, cast off by pulling one loop over another along the final row.
- Tie off the yarn end securely and weave loose tails back into the blanket stitches.
Tips and Variations
- Tip: Keep loop sizes consistent (about the height of two fingers) so your weave stays uniform and tight.
- Variation: Alternate yarn colors every few rows to create bold color-blocked stripes.
19. Painted Terrazzo Style Coasters
Introduction
Recreate chic Italian terrazzo stone surfaces on plain cork or wood bases using geometric acrylic paint speckles.
What This Idea Means
Surface painting brings interior design trends into small craft projects, using speckling techniques to simulate natural composite stone surfaces.
Materials Needed
- Plain cork or blank wooden coaster rounds
- Acrylic paints (white base, plus sage, terracotta, mustard, and black)
- Flat detail brushes and sponge applicators
- Clear waterproof acrylic sealer (gloss or satin)
How to Make It
- Paint the entire surface of the wooden or cork coaster with two solid coats of off-white base acrylic paint.
- Once dry, use fine brushes to paint irregular, sharp geometric chip shapes scattered across the surface in contrasting colors.
- Layer different sizes of “stone chips,” letting some overlap slightly.
- Add micro-dots using a toothpick dipped in dark grey or black paint for authentic texture.
- Seal with three coats of clear waterproof sealer to protect against cold drinks.
Tips and Variations
- Tip: Vary the chip shapes; avoid making circles—terrazzo chips look best with flat, irregular edges.
- Variation: Use pastel shades on black backgrounds for a modern cosmic terrazzo look.
20. Cozy Paper Mache Mushroom Room Accent Decor
Introduction
Sculpt whimsical fantasy mushrooms out of paper mache and cardboard to display on bookshelves or plant nooks.
What This Idea Means
Sculptural paper craft blends upcycling with storybook decor, converting simple paper and cardboard into sturdy art pieces.
Materials Needed
- Scrap cardboard, newspaper strips, and aluminum foil
- Paper tape (masking tape)
- Flour and water mixture (or PVA craft glue mixed with water)
- Acrylic paints and brushes
- Wood disc base or natural tree bark slice
How to Make It
- Build a stem out of rolled cardboard and shape a mushroom cap out of crumpled aluminum foil.
- Tape the cap and stem securely together using masking tape.
- Dip newspaper strips into a flour-water paste and wrap layers over the mushroom structure.
- Let the sculpture dry fully for 24-48 hours until rock hard.
- Paint the stem off-white and cap with rich crimson red, painting small white spots on top once dry.
- Glue the base of your paper mache mushroom onto a natural wood slice.
Tips and Variations
- Tip: Apply 3 thin layers of paper mache rather than one thick layer to ensure fast, complete drying.
- Variation: Dust gold mica powder or micro-glitter onto the mushroom gills for a mystical fairy-core effect.


