Spread the love

Summer days with toddlers are filled with boundless energy, curious hands, and bright sunlight. Finding activities that captivate a toddler’s developing senses while maintaining a calm, aesthetic, and clutter-free home environment can often feel challenging. Many traditional children’s crafts lean heavily on neon plastic, fleeting glitter, and disposable novelties that quickly end up discarded.

Modern parenting and intentional childhood design embrace a different philosophy: combining sensory exploration, open-ended creativity, and natural textures into keepsakes that you will actually be proud to display in your home. Toddler summer crafting should be as enriching for the child’s motor and tactile development as it is soothing and visually pleasing for the home atmosphere.

Below is an extensive collection of 20 modern, elegant, and developmentally rich summer crafts tailored for toddlers. Each craft is detailed with its conceptual meaning, a list of curated materials, step-by-step instructions, and practical styling variations.

1. Botanical Sunprints on Handmade Deckle Paper

Concept & Significance

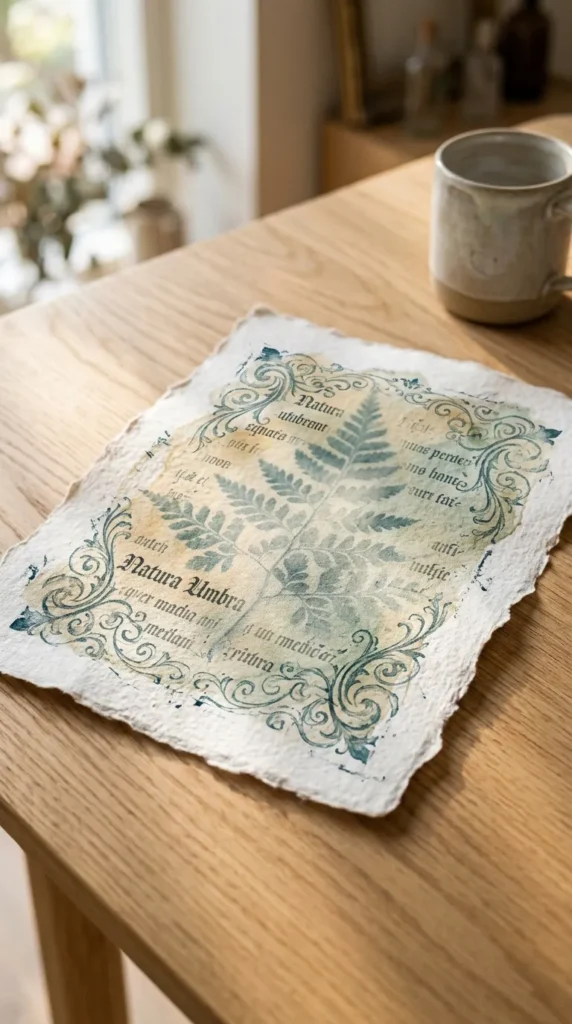
Botanical sunprinting captures the ephemeral beauty of summer flora using the power of natural sunlight. Instead of utilizing synthetic cyanotype chemicals that may irritate sensitive toddler skin, this modern adaptation uses light-reactive liquid watercolors or direct sun-bleaching on tinted handmade paper. The craft celebrates nature walks, mindful foraging, and the organic silhouettes of leaves, ferns, and wildflowers collected by little hands.

Materials Required

  • Heavyweight deckle-edge watercolor paper (linen or cotton rag)
  • Liquid non-toxic watercolors (soft ochre, slate blue, eucalyptus green, or warm terracotta)
  • Wide natural-bristle wash brushes
  • Foraged flat leaves, pressed petals, ferns, and clover
  • Clear acrylic sheet or heavy glass cutting board (to weigh down leaves)
  • A sunny patio or windowsill

How to Make It

  1. Take a leisurely morning walk with your toddler, collecting various flat leaves, herbs, and flowers in a woven wicker basket.
  2. Lay down an unprimed linen drop cloth outside in the shade.
  3. Wet the watercolor paper with clean water, then let your toddler wash broad strokes of liquid watercolor across the surface.
  4. While the paper is still glistening and wet, gently guide your toddler to arrange their foraged leaves directly onto the pigment.
  5. Place a clear acrylic plate firmly over the composition to keep the plant material completely flat.
  6. Move the arrangement into direct midday sunlight for 45 to 60 minutes. The exposed paint dries and fixes in the sun, while the covered areas remain lighter and moist.
  7. Carefully peel away the botanicals to reveal subtle, ghost-like silhouettes of the greenery.

Tips & Variations

  • Framing: Mount the dried deckle-edge paper inside a floating oak glass frame to showcase the raw edges.
  • Variation: Use diluted natural beet or turmeric dye for a completely food-grade botanical wash.
2. Minimalist Terracotta Clay Handprint Dishes

Concept & Significance

A timeless favorite reinvented for the contemporary home, these organic handprint catchalls preserve the tiny proportions of a toddler’s hand without the gaudy gloss or chalky feel of standard plaster casts. Using natural earthen terracotta or stone-white air-dry clay, these dishes feature soft irregular edges, subtle texture, and a gentle matte seal, making them perfect for holding heirloom jewelry, keys, or bedside treasures.

Materials Required

  • Premium mineral-based air-dry clay (warm terracotta or speckled sandstone)
  • Wooden rolling pin
  • Small shallow ceramic bowl (for molding)
  • Sandpaper (fine 220-grit)
  • Matte, non-toxic liquid varnish
  • Damp sponge

How to Make It

  1. Knead the clay on a smooth wooden board until soft and pliable.
  2. Roll out an even slab approximately 1/2-inch thick.
  3. Dust the toddler’s hand with a touch of cornstarch to prevent sticking, then guide their hand firmly into the center of the clay, applying gentle, even pressure on each finger.
  4. Cut an organic oval or soft circular boundary around the handprint, leaving at least one inch of border space.
  5. Smooth the rough edges with a damp sponge.
  6. Gently lift the clay slab and press it into a shallow bowl lined with parchment paper so it cures in a curved, dish-like silhouette.
  7. Allow to air dry for 48 to 72 hours, flipping once halfway through.
  8. Lightly buff rough spots with fine-grit sandpaper, brush away residue, and apply two coats of clear matte varnish.

Tips & Variations

  • Monogramming: Lightly press vintage wooden letter stamps with the child’s initials and year into the rim before drying.
  • Variation: Press a dried sprig of lavender next to the handprint for delicate floral debossing.

3. Nordic Driftwood & Linen Wind Chimes

Concept & Significance

Coastal elements bring quiet serenity into the nursery or covered patio. This craft combines smooth driftwood collected during beach outings with natural flax linen ribbons, wooden beads, and muted brass bells. It offers toddlers rich tactile sensations—feeling rough versus smooth surfaces—while teaching basic hand-eye coordination through threading and bead manipulation.

Materials Required

  • Smooth, sun-bleached driftwood branch (12–16 inches long)
  • Raw natural linen ribbon or cotton macramé cord
  • Large wooden geometry beads (unfinished maple or beechwood)
  • Small muted brass or vintage iron bells
  • Toddler-safe wooden threading needle
  • Jute twine for hanging

How to Make It

  1. Cut four to five lengths of cotton cord or linen ribbon of varying lengths (between 8 and 14 inches).
  2. Tie a brass bell securely to the bottom of each strand.
  3. Help the toddler thread raw wooden beads onto the cords using the wooden blunt needle, encouraging them to alternate shapes (cylinders, spheres, cubes).
  4. Knot the cord securely beneath each bead group to hold them in position.
  5. Tie each finished bead-and-bell strand evenly along the driftwood branch.
  6. Secure a length of jute twine at both ends of the main branch for horizontal suspension.

Tips & Variations

  • Sound Modulation: Use fewer bells and more wooden beads for a subtle, percussive clinking sound rather than loud ringing.
  • Variation: Dye portions of the linen ribbons in brewed black tea or avocado skin extract for warm, dusty rose and taupe hues.

4. Pressed Wildflower Frozen Suncatchers

Concept & Significance

A fleeting, seasonal art form that bridges sensory science and natural beauty, frozen suncatchers teach toddlers about temperature, light refraction, and the life cycle of plants. These translucent icy discs hang briefly from garden trees, catching the morning light, slowly melting away and leaving no environmental footprint.

Materials Required

  • Shallow round silicone cake pans or wide tart molds
  • Freshly picked edible flowers and garden leaves (pansies, chamomile, rose petals, mint, rosemary)
  • Filtered or distilled water (distilled yields glass-clear ice)
  • Jute twine or cotton string loop
  • Natural wooden rings

How to Make It

  1. Pour a 1/4-inch layer of distilled water into the silicone mold and let the toddler arrange a base layer of petals and greenery.
  2. Place the mold in the freezer for two hours until firmly set.
  3. Position a loop of jute twine at the top edge of the mold, keeping the knot submerged in the mold and the loop hanging out.
  4. Add another layer of petals and pour cold distilled water to fill the mold completely.
  5. Freeze overnight until solid.
  6. Gently unmold the ice disc and immediately hang it from a low-hanging garden branch or sunny outdoor hook.

Tips & Variations

  • Clarity: Boiling distilled water twice before freezing drives out micro-bubbles, creating crystal-clear ice.
  • Variation: Add slices of dehydrated blood orange and lemon rounds alongside the flowers for stained-glass color panels.

5. Linen Canvas Negative-Space Modernist Murals

Concept & Significance

Instead of chaotic, high-contrast scribbles on paper that inevitably end up crumpled in drawers, this project produces genuine gallery-worthy abstract art. By pre-masking geometric arches, circles, and intersecting paths using painter’s tape on stretched raw linen canvas, toddlers can freely paint with rich earth tones while naturally yielding sophisticated negative-space modernism.

Materials Required

  • Stretched raw linen canvas (square or portrait orientation)
  • High-grade low-tack painter’s tape or masking film
  • Matte acrylic or non-toxic gouache paints in earth tones (sage, cream, raw sienna, charcoal, dust pink)
  • Natural sea sponges, dense foam rollers, and wide flat brushes

How to Make It

  1. Lay strips of painter’s tape across the canvas to block out clean geometric forms: intersecting arches, Scandinavian half-moons, or mid-century lines.
  2. Press down tape edges firmly with a wooden craft stick to prevent color bleed.
  3. Set out shallow ceramic paint saucers with a curated palette of three to four harmonizing colors.
  4. Allow your toddler complete freedom to dab, sponge, and brush color across the entire canvas surface, covering both the linen and the tape.
  5. While the paint is slightly tacky but not completely dry, slowly peel away the painter’s tape to reveal sharp, crisp raw linen negative spaces.
  6. Let dry completely before hanging unframed.
See also  20 Craft Room Guest Room Combo

Tips & Variations

  • Color Restraint: Limiting the palette to three closely related tones ensures that even dense toddler layering results in sophisticated harmony rather than muddy brown.
  • Variation: Add a sprinkling of fine sea sand into one of the paint dishes to give sections a subtle, plaster-like architectural texture.

6. Earth Pigment & Beeswax Chalk Stones

Concept & Significance

Toddlers adore sidewalk drawing, but conventional chalks often break instantly, create harsh dust clouds, and feature synthetic fluorescent tones. Handcrafting ergonomic, pebble-shaped beeswax chalk stones gives toddlers a tactile, organic grip for their fine motor development, while introducing natural mineral colors derived from French ochres, slate, and ground terracotta.

Materials Required

  • Pure natural beeswax pellets
  • Natural carnauba wax flakes (adds hardness)
  • Natural cosmetic-grade earth pigment powders (yellow ochre, red iron oxide, French green clay, ultramarine)
  • Pebble or stone-shaped silicone baking molds
  • Double boiler and heat-safe pouring pitcher

How to Make It

  1. Melt equal parts beeswax and carnauba wax slowly in a double boiler over low heat.
  2. Divide the melted wax base into separate small heat-resistant containers.
  3. Stir in 1 to 2 tablespoons of natural earth pigment into each container until completely dissolved and rich in tone.
  4. Let your toddler watch from a safe distance as you pour the warm, liquid colored wax into pebble-shaped silicone molds.
  5. Allow the chalk stones to cool and harden at room temperature for three hours.
  6. Pop out the stone chalks; their ergonomic shape fits naturally into small toddler palms and leaves smooth, buttery marks on textured kraft paper or stone paving.

Tips & Variations

  • Safety: Always manage all melting and pouring steps yourself; let toddlers participate in selecting pigment colors, stirring cool ingredients, and unmolding the solid stones.
  • Variation: Pour multi-colored layers into each mold to create marbled drawing stones.

7. Woven Rattan & Dried Grass Suncatcher Hoops

Concept & Significance

This tactile weaving exercise introduces early fiber craft through natural, sensory-rich textures. Toddlers can practice spatial reasoning and threading using long-stemmed dried grasses, lavender sprigs, and wheat stalks interwoven across a classic wooden embroidery hoop or rattan frame.

Materials Required

  • Unfinished bamboo or beechwood embroidery hoops (6 to 8 inches)
  • Cotton twine or neutral macramé string
  • Dried botanical elements: bunny tails (lagurus), dried lavender, wheat sheaves, pressed strawflowers, eucalyptus
  • Wooden bead accents

How to Make It

  1. Loosely crisscross cotton twine across the inner hoop, creating a rustic, spiderweb-like structural warp, then tighten the outer hoop to lock strings firmly in place.
  2. Place a bundle of dried botanicals on a small wooden tray.
  3. Guide your toddler’s fingers to weave botanical stems in and out of the tensioned string warp.
  4. Trim overly long stem ends with scissors flush to the wooden rim.
  5. Suspend the finished hoop in front of a sunny window where the natural backlighting illuminates the intricate silhouettes and organic textures of the grasses.

Tips & Variations

  • Fragrance: Incorporate dried eucalyptus and French lavender to add a calming natural aroma to the child’s room.
  • Variation: Weave raw merino wool roving through the lower third of the hoop for added cloud-like softness.

8. Calming Oceanic Rice & Beechwood Sensory Tray

Concept & Significance

Sensory bins are a staple of toddler development, enhancing fine motor coordination, language development, and self-regulation. A curated, aesthetic oceanic sensory tray replaces garish blue plastic with naturally dyed grains, polished beach pebbles, smooth driftwood, and tactile wooden ocean figurines, fostering a serene, mindful play environment.

Materials Required

  • Uncooked long-grain white rice or dry chickpeas
  • Natural blue spirulina powder or organic food coloring (indigo and teal)
  • White vinegar (to set the dye)
  • Large shallow circular wooden tray or unfinished Baltic birch sensory bin
  • Natural shoreline elements: oversized polished river stones, large cowrie shells, smooth driftwood pieces
  • Beechwood scoops, small ceramic bowls, and mini wooden tongs

How to Make It

  1. In a glass jar, mix two cups of rice with one teaspoon of white vinegar and a small scoop of natural blue spirulina.
  2. Shake vigorously until the rice grains are uniformly coated in a pale seafoam color.
  3. Spread the rice on baking sheets lined with parchment to dry completely for two hours.
  4. Repeat the process with a second batch using a drop of teal dye to create dual ocean tones.
  5. Pour the dried rice into the wooden tray, gently swirling the two ocean shades together.
  6. Arrange smooth stones, large sea shells, and wooden scoops into clean, designated quadrants to encourage self-directed sorting and pouring.

Tips & Variations

  • Containment: Place the wooden sensory tray on top of a large, low-pile neutral cotton floor blanket to make post-play cleanup effortless.
  • Variation: Hide wooden alphabet letters or wooden fish silhouettes beneath the rice for an archaeological discovery game.

9. Monochromatic Herbarium Paper Lanterns

Concept & Significance

Soft lighting creates an atmosphere of safety and quiet wonder in a toddler’s bedroom. These lanterns use translucent vellum paper, simple wooden dowels, and carefully placed pressed leaves. Toddlers experience the sensory pleasure of smooth paper, cool botanical surfaces, and child-safe decoupage paste, producing a soft luminary for summer bedtime stories.

Materials Required

  • Heavyweight translucent vellum sheets (90–120 GSM)
  • Pressed summer herbs and delicate leaves (fern fronds, mint leaves, Japanese maple leaves)
  • Matte Mod Podge or homemade water-and-arrowroot paste
  • Soft goat-hair flat brush
  • Four square unfinished basswood framing strips
  • Battery-operated warm LED tea light or fairy light strand

How to Make It

  1. Lay the vellum sheet flat on a clean work surface.
  2. Let your toddler brush a sheer layer of adhesive paste across the vellum surface.
  3. Place pressed leaves and delicate herb sprigs onto the wet glue, pressing flat with clean fingertips.
  4. Apply a second thin, protective coat of matte decoupage sealant over the leaves and allow to dry flat for two hours.
  5. Fold the vellum into a clean three-dimensional cylinder or four-sided rectangle.
  6. Adhere the wooden basswood strips along the top and bottom borders with non-toxic wood glue to provide weight and architectural structure.
  7. Place a warm flickering LED candle inside.

Tips & Variations

  • Safety First: Never use open flame candles with vellum paper crafts; stick exclusively to warm-white LED tea lights with safety-screwed battery compartments.
  • Variation: Use dried citrus slices pressed paper-thin for an amber glow.

10. Textured Plaster-Style Canvas Tile Sculptures

Concept & Significance

Inspired by sculptural European wall art, this tactile activity lets toddlers explore thick paste mediums without toxic construction materials. By whipping non-toxic modeling paste or whipped paper clay with warm beige pigments, toddlers can scrape, comb, and imprint rhythmic textures into wooden cradled boards using wooden clay tools and natural shell edges.

Materials Required

  • Square wooden painting cradled panels (6×6 or 8×8 inches)
  • Non-toxic lightweight flexible modeling paste or air-dry plaster clay
  • Natural powdered mineral pigment (warm alabaster, oat, stone gray)
  • Wooden pottery ribs, coarse sea shells, and notched wooden pastry scrapers
  • Matte protective spray sealer

How to Make It

  1. Tint the modeling paste in a mixing bowl with a pinch of oat-colored mineral pigment until thoroughly blended.
  2. Scoop a generous mound of the thick, fluffy paste onto the center of the wooden panel.
  3. Encourage your toddler to use their hands, wooden scrapers, or the ridges of large scallop shells to pull, swirl, and comb lines through the paste.
  4. Let them stamp textured items (like the knobby end of a pinecone or a river stone) into the corners.
  5. Allow the textured panel to cure undisturbed on a high shelf for 24 hours until hard and stone-like.
  6. Lightly seal the surface with a non-toxic matte clear coat.

Tips & Variations

  • Tactile Play: The marshmallow-like consistency of whipped modeling paste provides sensory satisfaction without dripping or staining like traditional paints.
  • Variation: Create a triptych of three matching panels using slightly varied scraping tools for a gallery wall in the playroom.
See also  20 Luxury Inspiring Crafting Nook Ideas

11. Sculptural Recycled Pulp Paper Bowls

Concept & Significance

Teaching early sustainability through tactile transformations, this craft turns mundane recycled egg cartons and kraft paper into delicate, textured papier-mâché bowls with an organic wabi-sabi aesthetic. Toddlers love the sensory feeling of tearing, squishing wet paper pulp, and pressing it into shape.

Materials Required

  • Unbleached recycled egg cartons or natural cardboard shreds
  • Warm water
  • Blender (managed by the adult)
  • 2 tablespoons of organic cornstarch or wheat paste
  • Small ceramic bowls (used as inverted molds)
  • Plastic wrap or olive oil (for release)
  • Edible flower petals or dried marigold flakes

How to Make It

  1. Have your toddler tear the egg cartons into small, postage-stamp-sized pieces and drop them into a large ceramic basin of warm water to soak for an hour.
  2. Transfer soaked paper to a blender with extra water and pulse until smooth, oatmeal-like pulp forms.
  3. Drain excess water through a mesh colander, pressing gently with a wooden spoon.
  4. Mix in the cornstarch paste and dried marigold petals, letting your toddler squish the pulp with their hands.
  5. Invert a smooth ceramic bowl and coat the outside with a light sheen of olive oil or plastic wrap.
  6. Guide your toddler to press handfuls of pulp firmly over the outside of the bowl, shaping an even 1/4-inch shell with an uneven, organic rim.
  7. Allow to dry in a sunny, well-ventilated spot for 48 hours until completely rigid and light as a feather.
  8. Gently pop the pulp bowl off the ceramic mold.

Tips & Variations

  • Coating: Leave the exterior textured and raw, but paint the interior base with a soft gold leaf or warm cream gouache.
  • Variation: Add wildflower seeds directly into the pulp so that when the bowl has served its purpose, it can be planted directly into garden soil.

12. Minimalist Ceramic Garden Plant Markers

Concept & Significance

Gardening with toddlers connects children to the rhythm of nature. These sleek, minimalist garden plant markers use durable white ceramic air-dry or polymer clay stamped with vintage typography. Toddlers participate in rolling, stamping, cutting, and placing them in outdoor planter boxes alongside fresh herbs and summer vegetables.

Materials Required

  • White mineral-rich outdoor-curing air-dry clay or bakeable polymer clay
  • Small wooden alphabet stamp set
  • Wooden ruler or clay trimming knife
  • Sandpaper (medium and ultra-fine)
  • Outdoor non-toxic matte weather sealant
  • Fresh herb sprigs (for decorative leaf impressions)

How to Make It

  1. Roll out the clay evenly to a sturdy 3/8-inch thickness on parchment paper.
  2. Cut clean, elongated rectangular stakes approximately 1 inch wide by 6 inches long, shaping one end into a pointed triangle stake.
  3. Help your toddler gently press individual vintage alphabet letter stamps into the wet clay to spell out garden names: MINT, BASIL, THYME, SAGE, TOMATO.
  4. Beside the lettering, let the toddler press an actual leaf from the corresponding plant into the clay to make a botanical impression.
  5. Allow the markers to dry flat or bake according to clay manufacturer instructions.
  6. Sand edges smooth and coat thoroughly with two layers of outdoor matte sealer to protect against soil moisture.
  7. Let your toddler push the stakes into their respective patio planter pots.

Tips & Variations

  • Spacing: Draw a straight pencil guideline along the clay strip to help align the toddler’s stamped letters evenly.
  • Variation: Leave the markers unpainted for a raw bisque ceramic look, or paint the stamped indentations with charcoal watercolor before sealing.

13. Sun-Dyed Gauze Summer Play Silks

Concept & Significance

Open-ended toys promote creative play far better than single-function plastic toys. Hand-dyeing 100% organic cotton gauze or lightweight mulberry silk with your toddler using gentle summer botanical extracts (like marigolds, turmeric, and dried hibiscus) yields beautiful dress-up silks, doll blankets, and fort-building canopies.

Materials Required

  • 100% pure organic cotton double-gauze or hemmed silk play cloths (approx. 24×24 inches)
  • Natural dye baths: boiled avocado stones (dusty blush), yellow marigold blossoms (warm ochre), or butterfly pea tea (soft periwinkle)
  • Soy milk or alum (used as an environmentally safe toddler mordant)
  • Glass mason jars or ceramic dye basins
  • Wooden tongs

How to Make It

  1. Pre-soak the fabric cloths in a mild soy milk bath overnight to help natural dyes bind to natural plant fibers.
  2. Wring out excess moisture. Let your toddler twist, bunch, or fold the cloths, securing them loosely with thick cotton baker’s twine to create organic tie-dye patterns.
  3. Prepare lukewarm, strained botanical dye baths in wide ceramic bowls.
  4. Allow your toddler to lower the bunched cloths into the colored natural baths using smooth wooden tongs.
  5. Leave the fabrics submerged for 4 to 6 hours in a sunny outdoor corner.
  6. Untie the cords together, rinse in cool rainwater until clear, and hang to flutter dry on a low garden clothesline.

Tips & Variations

  • Sun Power: Set the glass jars filled with dyes and fabric directly in the summer sun to let solar warmth slowly infuse the colors.
  • Variation: Drop iron-rich water drops across an avocado dye bath to shift sections into moody slate-gray tones.

14. Hand-Hewn Natural Wooden Block Town

Concept & Significance

Building blocks are essential developmental toys that encourage spatial reasoning, balance, and fine motor skills. Instead of mass-produced plastic building sets, you and your toddler can design a heirloom-quality miniature architectural town using reclaimed hardwood scraps, sand blocks, and non-toxic, water-based milk paints in Scandinavian hues.

Materials Required

  • Assorted untreated hardwood and softwood offcuts (beech, pine, oak, walnut blocks of various geometric shapes)
  • Sanding sponges (medium and fine grit)
  • Natural organic milk paint powders (chalk white, muted terracotta, dusty olive, warm stone)
  • Small soft round brushes
  • 100% organic beeswax and coconut oil wood polish
  • Cotton buffing cloth

How to Make It

  1. Spend time sitting together on a woven floor mat sanding down every sharp corner and edge of the wooden offcuts until soft and velvety.
  2. Mix small ceramic bowls of natural milk paint using warm water.
  3. Let your toddler paint simple color blocks onto select sides of the wooden pieces, leaving other sides in raw, unfinished wood grain for visual contrast.
  4. Allow the milk paint to dry for 30 minutes; it absorbs directly into the wood fiber with an ultra-matte, chalky finish.
  5. Use a cotton rag to rub warm beeswax balm over the entire surface of each block, letting your toddler help buff the wood into a rich, water-resistant sheen.

Tips & Variations

  • Architectural Elements: Use a fine non-toxic black pigment pen to sketch simple minimalist window arches or doors onto a few of the painted blocks.
  • Variation: Collect small tree branches, saw them into flat circular discs, and sand them down to serve as mini rooftops and landscape steps.

15. Botanical Leaf-Impression Salt Dough Coasters

Concept & Significance

Salt dough is one of the most accessible and safe sculpting mediums for young toddlers. When mixed with ultra-fine white flour, natural sea salt, and a touch of vegetable oil, it forms a clay-like dough that captures fine botanical vein details. Cured and sealed with matte lacquer, these become modern, functional drink coasters.

Materials Required

  • 2 cups ultra-fine unbleached white flour
  • 1 cup fine sea salt
  • 3/4 cup warm filtered water
  • 1 tablespoon olive oil
  • Freshly clipped architectural leaves (monstera, fig leaf, fern fronds, rosemary needles)
  • Circular cookie cutter or rim of a wide water glass (approx. 4 inches)
  • Fine-grit sandpaper and clear matte sealer

How to Make It

  1. Combine flour, sea salt, water, and olive oil in a ceramic bowl. Knead for 5 minutes until smooth and elastic.
  2. Roll the dough flat to a uniform 1/4-inch thickness.
  3. Let your toddler place textured garden leaves vein-side-down onto the dough surface.
  4. Gently roll over the leaf with a wooden rolling pin, embedding the botanical patterns firmly into the dough.
  5. Carefully peel away the leaves to reveal crisp vein impressions.
  6. Cut out clean geometric circles around each impression using the cookie cutter.
  7. Bake the dough rounds on a parchment-lined tray at low heat (200°F / 95°C) for 2.5 to 3 hours until completely dehydrated and bone-hard.
  8. Cool completely, lightly sand the base flat, and seal with a non-toxic matte clear coat.

Tips & Variations

  • Low & Slow: Do not turn up the oven temperature; higher heat causes salt dough to puff up and blister, ruining the flat coaster surface.
  • Variation: Paint a delicate wash of diluted grey watercolor over the leaf impression, wiping the surface immediately so color remains settled only within the leaf grooves.
See also  20 Inspiring Crafts for Teens

16. Scandinavian Modern Clay Bead Necklaces & Garlands

Concept & Significance

Bead manipulation is an exceptional activity for toddler pincer grasp development and hand-eye coordination. By hand-rolling organic, imperfect beads from non-toxic earth clays, baking them, and stringing them onto natural leather cord or raw cotton ribbon, toddlers can make statement nursery garlands or wearable accessories for family members.

Materials Required

  • Oven-bake polymer clay or air-dry ceramic clay in earth-toned neutral colors (ecru, granite, cinnamon, almond)
  • Wooden skewers or bamboo toothpicks (for piercing bead holes)
  • Unfinished leather cord or raw natural cotton twine
  • Wooden bead accents (raw unfinished beechwood)
  • Blunt child-safe tapestry needle

How to Make It

  1. Pinch small pieces of clay and demonstrate how to roll them between palms into organic spheres, faceted cubes, or flattened discs.
  2. Let your toddler roll and shape their own collection of beads, embracing charming wabi-sabi imperfections.
  3. Carefully pierce a large center hole through each bead using a wooden skewer, gently wiggling the tool to ensure the hole is wide enough for easy toddler stringing.
  4. Bake or dry the beads according to the clay manufacturer’s instructions.
  5. Tape one end of the cotton twine to the table to keep beads from slipping off.
  6. Hand the child-safe needle and string to the toddler, letting them alternate clay beads with raw wooden beads to create their own rhythm.
  7. Tie off ends with clean knots.

Tips & Variations

  • Bead Size: Keep beads larger than 1 inch in diameter for young toddlers to prevent any choking hazards and ensure easy grip.
  • Variation: Thread the finished bead sequence onto a horizontal brass wall ring to hang as a sculptural wall hanging.

17. Hand-Drawn Minimalist Cotton Canvas Tote Bags

Concept & Significance

Summer is synonymous with trips to the local farmers market, library, and beach. Toddlers take pride in carrying their own personal gear. This craft elevates the classic canvas bag by using simple hand-cut geometric sponge stamps, fabric-safe earth pigments, and natural unbleached cotton totes, creating an accessory suited for daily errands.

Materials Required

  • Unbleached 100% heavy cotton canvas tote bags
  • High-density cellulose sponges (cut into arches, semicircles, triangles, and thin bars)
  • Non-toxic, permanent textile fabric paints (warm umber, slate gray, olive, soft ochre)
  • Shallow wooden trays or ceramic paint dishes
  • Thick scrap cardboard (inserted inside the bag to prevent bleed-through)

How to Make It

  1. Insert a piece of thick cardboard flat inside the tote bag and iron out any fabric wrinkles.
  2. Dip the pre-cut sponge shapes lightly into textile paint, dabbing off excess pigment on a paper towel.
  3. Hand the stamps to your toddler, encouraging them to press shapes onto the fabric in repeating patterns or abstract clusters.
  4. Let the paint dry completely for 24 hours.
  5. Heat-set the painted pattern by ironing over it with a dry pressing cloth for 3 minutes to ensure the colors remain wash-fast and permanent.

Tips & Variations

  • Pattern Guidance: Use painter’s tape to establish a dedicated 4-inch horizontal band across the lower third of the bag for a modern dipped look.
  • Variation: Replace sponge stamps with halved summer produce (such as crisp heirloom apples or cross-sections of bell peppers) for organic stamp forms.

18. Floating Modernist Origami & Driftwood Mobiles

Concept & Significance

Watching gentle movement in a soft summer breeze helps toddlers develop visual tracking and offers a soothing sensory reset during quiet time. This sculptural mobile pairs lightweight, modern geometric paper shapes folded from heavy textured kraft paper with delicate brass wire and a smooth piece of sun-bleached branch.

Materials Required

  • Premium double-sided textured linen origami paper (subtle stone, parchment, and charcoal tones)
  • Thin, lightweight craft wire or invisible nylon thread
  • Balanced piece of lightweight driftwood or a smooth sanded beech dowel
  • Small wooden craft beads
  • Small hole punch

How to Make It

  1. Help your toddler with simple, crisp geometric folds (such as modern paper diamonds, clean accordion fans, or simple geometric kites).
  2. Punch a tiny hole at the apex of each folded paper component.
  3. Thread clear nylon string or thin wire through the hole, anchoring it with a tiny wooden bead underneath.
  4. Let your toddler choose which paper shapes hang together along the driftwood stick.
  5. Tie each strand at varied, cascading heights along the branch.
  6. Test and adjust the balance point on the main suspension cord so the mobile drifts smoothly in natural room air currents.

Tips & Variations

  • Air Flow: Hang the mobile near an open screened window or air duct where natural movement keeps the geometric shapes rotating.
  • Variation: Integrate a single, polished sea glass pendant at the center of the mobile to catch and refract incoming sunlight.

19. Garden Mud & Wildflower Seed Bomb Spheres

Concept & Significance

Tactile “messy play” is vital for early childhood neurodevelopment, but it can easily be channeled into a productive, mindful ecological project. Mud seed bombs allow toddlers to get their hands comfortably dirty while crafting nutrient-rich seed balls designed to be tossed into backyard garden patches or bare soil corners to bloom into pollinator-friendly wildflowers.

Materials Required

  • 2 parts natural dry red powdered pottery clay
  • 1 part organic potting compost or worm castings
  • 1 part water
  • Native, non-invasive pollinator wildflower seeds (poppies, cosmos, sweet alyssum, echinacea)
  • Kraft egg cartons (for drying)

How to Make It

  1. In a wide washbasin, let your toddler mix the dry red clay powder and rich organic compost together with their hands.
  2. Slowly add small amounts of water, guiding your toddler to squeeze and knead the mixture until it reaches the consistency of firm cookie dough.
  3. Sprinkle the wildflower seeds across the mud mixture and knead again until evenly distributed.
  4. Show your toddler how to pinch off small portions and roll them between their palms into round, 1-inch mud spheres.
  5. Place the seed balls into the compartments of a recycled egg carton to dry in the shade for 24 to 48 hours.
  6. Take an evening garden walk with your toddler and let them toss the dried seed bombs into garden beds before a summer rain.

Tips & Variations

  • Clay Purpose: The natural clay protects the inner seeds from birds and baking sun until rainfall dissolves the sphere and germinates the seeds.
  • Variation: Pack the seed bombs into mini woven jute bags tied with linen ribbon as homemade garden gifts for neighbors and grandparents.

20. Architectural Shadow Frame Specimen Displays

Concept & Significance

Toddlers are natural collectors, often picking up small rocks, interesting twigs, acorn caps, and feather fragments wherever they go. Instead of letting these treasures accumulate in pockets or scatter around the floor, this project elevates the child’s discoveries into museum-style shadow frame specimen boxes.

Materials Required

  • Deep-set wood shadow frames (unfinished birch or light oak with glass)
  • Heavy archival cotton cardstock (warm white or off-white)
  • Toddler-safe non-toxic craft adhesive or double-sided museum gel dots
  • The toddler’s curated collection of summer treasures: flat river stones, unique twigs, dried cicada shells, snail shells, pressed leaves, feathers
  • Calligraphy pen or vintage typewriter (for labeling)

How to Make It

  1. Spread out all the treasures your toddler has gathered over a week of summer walks on a clean linen tablecloth.
  2. Help your toddler sort the items by category, color, or shape, selecting 4 to 6 favorite, well-preserved pieces.
  3. Cut archival cardstock to fit the back panel of the shadow frame.
  4. Use a pencil and ruler to mark a balanced grid of points on the cardstock backing.
  5. Assist your toddler in applying a small dot of museum mounting gel behind each specimen, pressing the item firmly onto the designated grid points.
  6. Write the month, year, and location of the finds at the bottom of the cardstock in clean, understated lettering.
  7. Assemble the frame and mount it on the wall in their bedroom at eye level.

Tips & Variations

  • Preservation: Ensure organic specimens like twigs and stones are clean and completely dry before mounting to prevent any moisture buildup inside the sealed glass frame.
  • Variation: Create a seasonal series of four matching frames: one for each season of your toddler’s year.